Stone Setting for Beginners (How to Get Started)
Stone setting is one of the most important (and in demand) skills when it comes to jewellery making and it is the only skill that I really wanted to learn.
But the problem is that there is a lack of information online about how to get started, which is why I’ve created this post as I want to give you the basics and also links to other resources so that you can continue your journey in this amazing skill.
What Equipment Do You Need For Stone Setting?
In order to be able to do stone setting, you are going to need some tools and as with everything when it comes to jewellery making, there are plenty of options out there and I’ll try to cover as much as possible below.
But how much do you need to spend in order to get started?
This will depend on what you already have as many jewellers will already have some tools but if you were starting from scratch, I would say £300 – £500 ($400 – $600) for a basic setup and £3,000+ ($4000+) for a more advanced one and this isn’t factoring in things like a bench, chair, lighting etc.
Work Holding
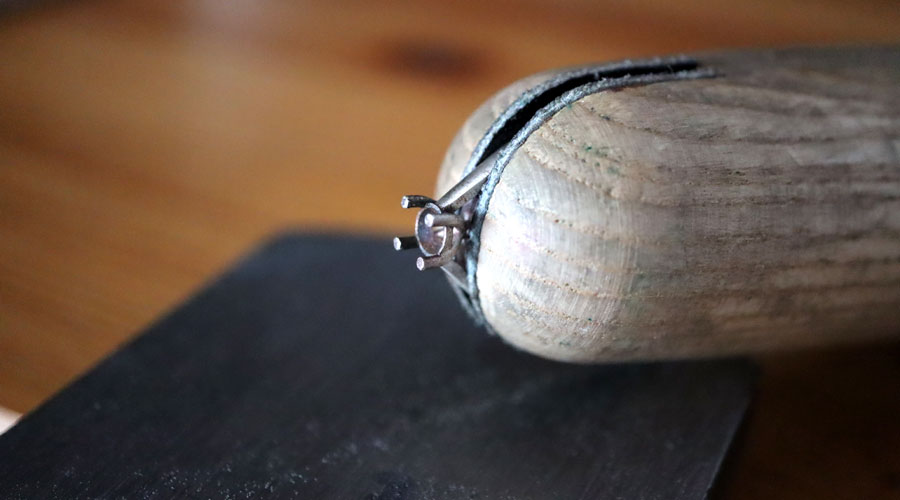
One of the first things you are going to need is something to hold your work but due to the different types of jewellery we set stones into, such as rings, pendants and earrings, you may need a few different pieces of kit.
But in the main, there are three options for holding your work for setting, which are:
- Rings Clamps – these are the cheapest option as they can be bought for less than £10 ($10) and work really well with a normal bench peg and as the name suggests, they are best suited for rings, with the wedge style and screw clamps being the most popular
- GRS Benchmate – this is a bench-mounted system designed by GRS to make setting and some jewellery-making tasks easier and it comes with plenty of attachments, which makes it suitable for many different types of jewellery
- Engravers ball vice – a popular option for setters, especially if you have a dedicated setting bench, they come in two sizes, the larger 5kg and smaller 2kg (the most popular with setters) and as with the Benchmate, there are plenty of accessories which makes it ideal for different types of jewellery

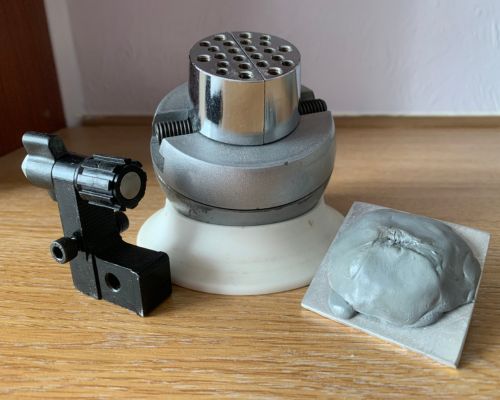
The last two are great but expensive as both the GRS Benchmate and GRS Microblock will cost you over £300 ($400) for the basic set and a few hundred pounds more for all the attachments.
Fortunately, there are cheaper engravers vices out there that can be had for around £100 ($120) that will do the job and I know this as I have one as I couldn’t warrant the cost of a genuine GRS one.
Another thing you will need, whatever system you are using is something to hold the piece firm and the most popular options are:
- Shellac
- Setters cement or pitch
- Thermo plastic such as Thermo-loc
Which one to go for depends on who you ask but I personally prefer thermo plastics as they only require a heat gun in order to be able to use.
Magnification
While you can do some stone setting with just your eyes, you usually get a much better result if you use some form of magnification as it makes it easier to see what you are doing.
When it comes to magnification, there are two popular options:
- Optivisors – these are basically headbands with a magnified lens at the front and they come in different strengths, these are popular with bench jewellers and as they cost around £50 ($50), it makes them a very cost-effective option
- Microscopes – these are now the tool of choice for many professional setters, especially ones doing micro-setting as they offer much better levels of magnification and when set up correctly, also help improve posture but cost anywhere from £400-£500 for an entry-level Amscope up to £2,000+ for a Meiji or Leica with an acrobat arm
If you are just getting started, an Optivisor is probably the way to go (unless you can afford a microscope), just make sure you buy a genuine one as the lenses in the cheaper ones aren’t great for your eyes.
Drills, Bits & Burrs
A drill is a jewellery bench staple but it is an essential tool for many different styles of stone setting and there are two main options that you can choose from:
- Pendant Drill – a very popular option as they are relatively inexpensive to buy (between £300 and £500 depending on brand), have good levels of torque and many brands offer a selection of different handpieces but flex-shafts are a bit limited when it comes to control and can ‘kick’ when starting
- Micromotor – these are becoming more popular among setters as they are more controllable and have a much smoother start but cheaper models can lack a bit of torque and machines with higher torque are more expensive, with some models costing over £1,000
I’ve used both and I prefer the micromotor as I just find it a lot easier to use, even though my current one (Foredom K1070) lacks the torque for some jobs, which is why I do regret selling my pendant drill!
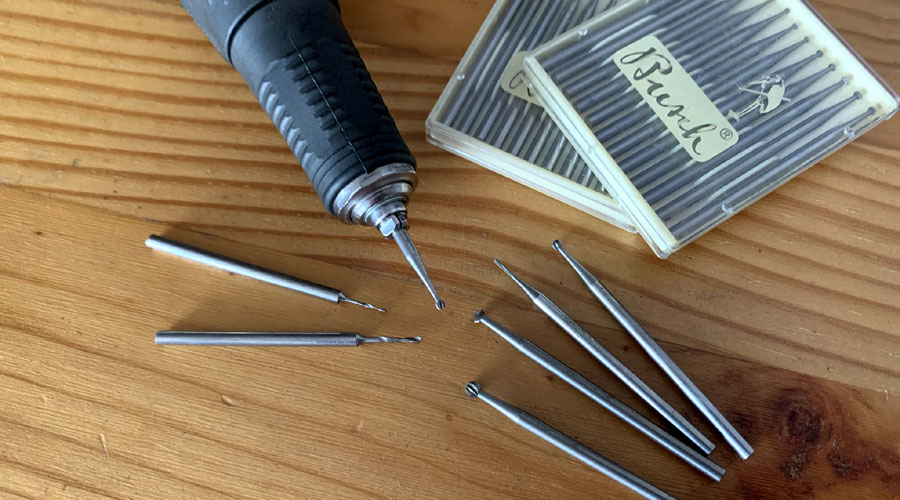
In order to remove metal, you are going need drill bits and burrs (they are known by other names as well) and there are many different burrs to choose from, including:
Then you have the choice of Hardened Steel or Carbide Burrs.
Hardened steel burrs are a lot cheaper and suitable for softer metals like silver and gold but will go dull and wear away over time. Carbide burrs are a lot harder and work well with all metals and can be used with harder metals like Stainless Steel but are more likely to chip.
When you are just getting started, I’d recommend getting 0.6mm & 1mm drill bits and a set of hardened steel ball burrs and then adding others as and when you need them.
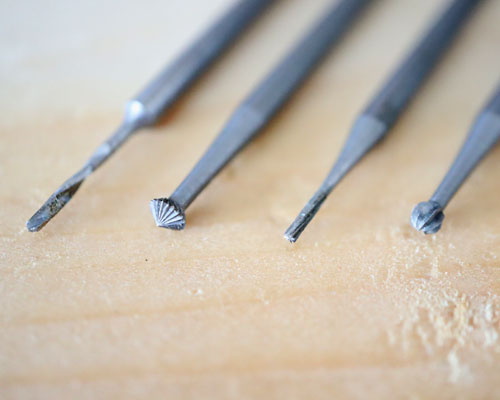
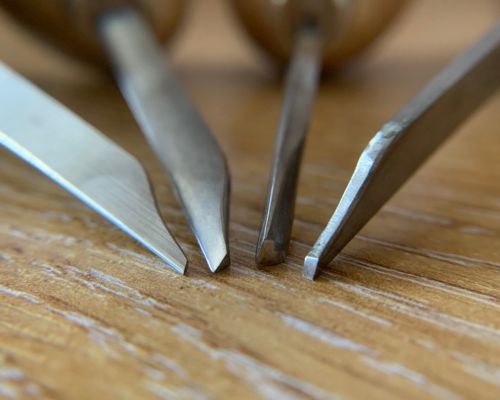
Gravers
Another very important tool for stone setters are gravers as they not only help you remove metal but allow you to create bright cuts and add the finishing touches to some styles of setting.
There are many different types of graver that you can choose from, with them all allowing you to achieve something different, with the ones I use the most being:
And as the burrs, they come in two different metals, HSS (High Speed Steel) and Carbide.
HSS gravers are the most commonly used as they work well with softer metals like Silver and Gold but do go dull and require re-sharpening, Carbide gravers generally keep a better edge but are more likely to chip but work really well on Platinum and Stainless Steel.
Next, you have how the gravers are powered, with three options:
- Push Gravers – this is where you manually push the gravers to remove the metal, this is the cheapest method to get started with as you just need to buy some handles for your gravers but it requires a fair bit of skill to do this effectively
- Pneumatic Gravers – these are engraving machines (like the GRS Gravermach or Lindsay Airgraver) that use compressed air to drive a small piston within the handpiece against the back of the graver, which makes using a graver a whole lot easier
- Electric Gravers – a new entry to the market are electric gravers, such as the Pulsegraver, which uses electricity instead of air to power the piston in the handpiece
The push gravers are by far the cheapest method as you can get a decent set of gravers for less than £100. Pneumatic gravers are quite expensive as the GRS and Lindsay offering cost over £1,000 and you need an air compressor that works with them.
You can get ones with a built-in compressor like the JURA Artgraver, which will set you back in the region of £2,500. The electric-powered Pulsegraver is also in the same kind of price range.
In addition to this, you will need to form and sharpen your gravers, which is going to require some additional equipment, such as:
- Bench grinder
- India or Arkansas Stone
- Polishing wheels, such as Ceragloss wheels (you use these with your drill)
Dividers
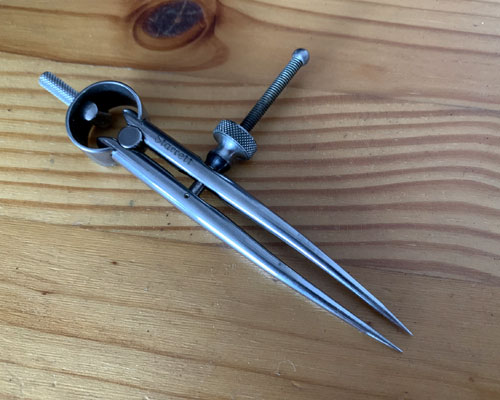
Dividers are really useful for helping you mark out your work, such as where the stones are going to go or where you need to do bright cuts.
There are plenty of options out there but from experience, the cheaper ones are very loose and don’t stay sharp.
Starrett is a good brand and reasonably priced (about £50), with the Jura Digital Divider (£150ish) and GRS AlexTools (£300ish) being very popular with professional setters.
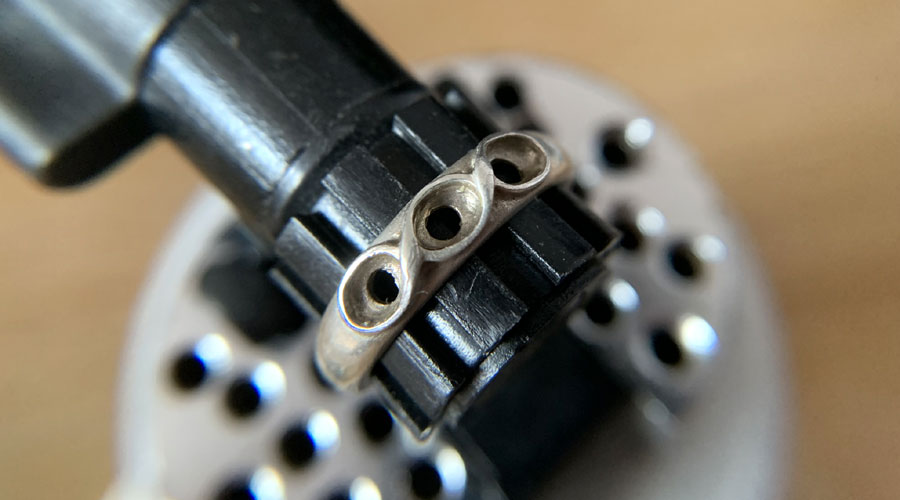
Pushers & Pliers
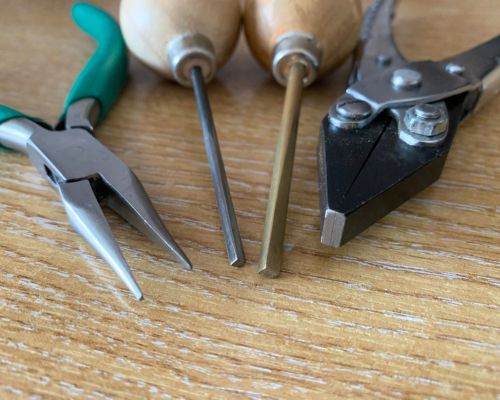
Two stone setting essentials, pushers can be used for securing bezels and tightening claws, they can be made out of steel or brass.
Pliers are often used to tighten claws and can also be used for vector tightening, I have normal and parallel pliers.
There are also bezel rockers, which can also be used for moving the metal and can be useful for setting larger cabochons in bezels.
Needle Files
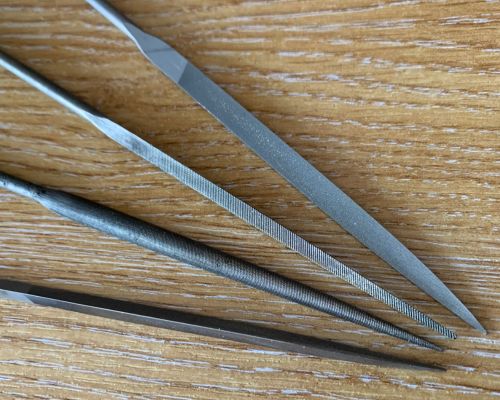
Another jewellery bench staple but one that is often used in stone setting, the ones I use the most are:
- Three Square
- Barrette
I would recommend cut 4 and also making a safety file, which is where you remove the teeth from one side and edge as this helps to stop you damaging the stone.
Burnishers
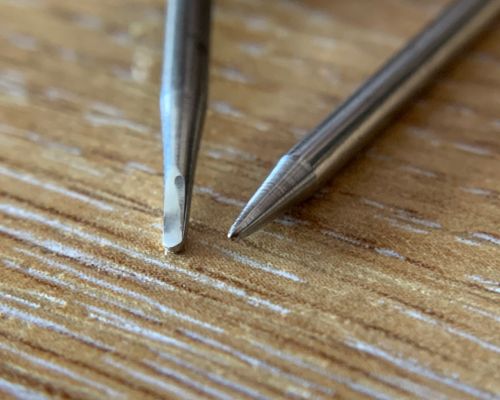
For certain types of settings, such as bezel or flush setting, burnishers can not only help to set the stone but also provide a finish to the metal.
You can buy large burnishers, which can be used for bezels but I prefer to make my own out of old burrs as you can create ones that are ideal for flush setting and can also be used for bezels.
Polishing Wheels & Accessories
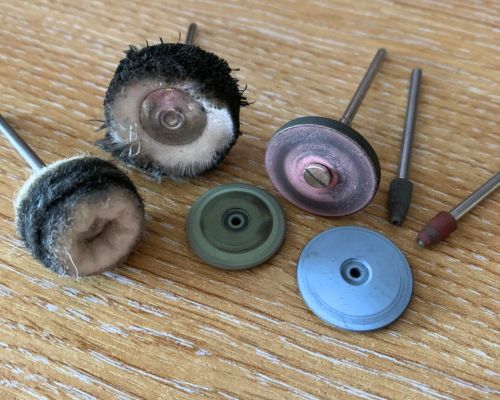
These are the small polishing wheels and accessories that are used with your drill as they allow you to clean up and polish the inside of the setting before you put the stone in and help you add the finishing touch to the setting.
Rubber wheels and cones are probably the two I use the most, followed by the felt polishing wheels.
If you don’t have any polish, you may need to buy some.
I know this looks like a lot of tools and it is but if you are doing this on a budget, then the most expensive things are going to be:
- The Drill
- Headband Magnifier
- Gravers
When you are just getting started you don’t need a microscope, powered graver or fancy thing to hold your work, these are all things you can upgrade to at a later date (which is what I am slowly doing).
Most of the others aren’t that expensive and things like burrs and rubber wheels etc are all consumables.
What is the Easiest Stone Setting to Learn?
When you are just getting started with stone setting, it can be a little bit daunting as to where to start and which type of stone setting you should learn first.
To help you out, I’ve put together a quick list of what I think are the easiest setting styles to learn (from easiest to more difficult) and what you can progress onto from learning this setting style based on my own experience of learning how to set stones (I’ll also include some pictures of my first attempts!).
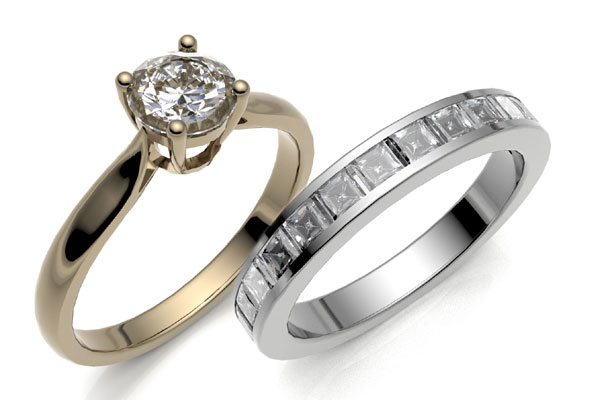
1. Flush Setting
In my opinion, the easiest setting to learn is flush setting as you only need basic equipment to start practicing this, which includes:
- A flat sheet of copper or brass
- Some 2mm Round CZs (you can use other sizes but I found these the best)
- A 1mm drill bit and some ball burrs
- A needlepoint burnisher
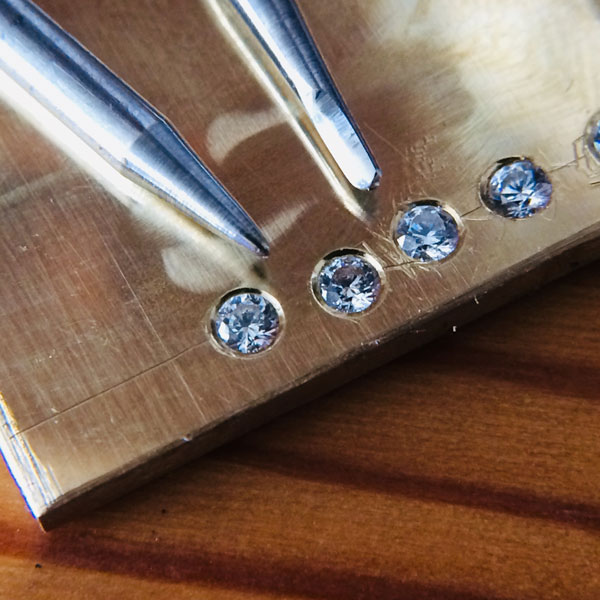
The technique for round stones is also pretty simple and beginner friendly and you can practice this over and over again until you get it nailed.
Next Steps – after learning how to flush set round stones, you can learn how to flush set fancy shapes such as oval, square and marquise cut stones.
2. Grain Setting
Grain setting is another technique that can be done repeatedly on a piece of copper or brass and is the technique that most setters get started with, for this you will need:
- A flat sheet of copper or brass
- Some 2mm Round CZs (you can use other sizes but I found these the best)
- A 1mm drill bit and some ball burrs
- A half-round or square graver
- Beading tools
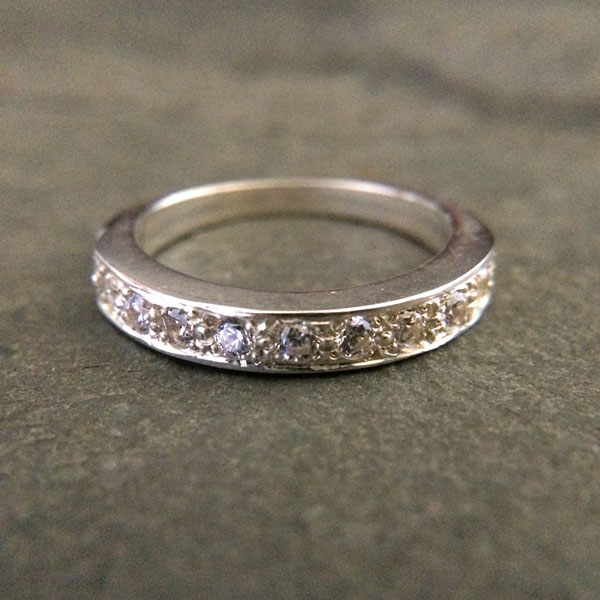
When just getting started, I found learning how to set a single stone with 4 grains was the easiest as this gets you to start using gravers and understanding how they work.
Next Steps – once you have learnt how to set a single stone, you can look at star settings, single row grain setting and pave.
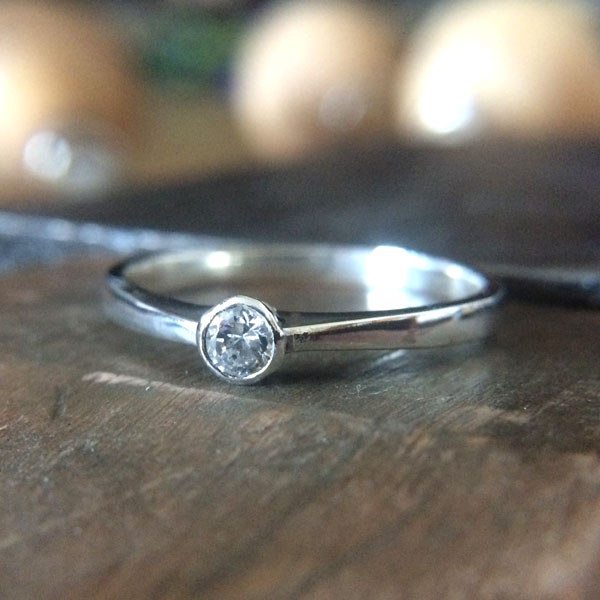
3. Bezel Setting
This is the technique that many jewellery makers start with as they often make bezels when they are learning how to make jewellery and while the technique is quite simple, good execution often comes with lots of practice. To start doing bezel setting, you will need:
- Round or oval bezels and stones
- Burrs (to create a seat for faceted stones)
- A pusher
- A burnisher
- Graver (optional but helps to give a bright-cut finish)
Why this isn’t higher up the list is that getting bezels (or making them) can be expensive, which isn’t ideal for doing repeated practice and even practice castings you can get aren’t cheap.
Next Steps – once you have learnt how to set round and oval stones, you can move on to fancy-shape stones, especially ones with points as these require some additional steps. Knowing how to do bezel setting can also be helpful for doing V claws as well.
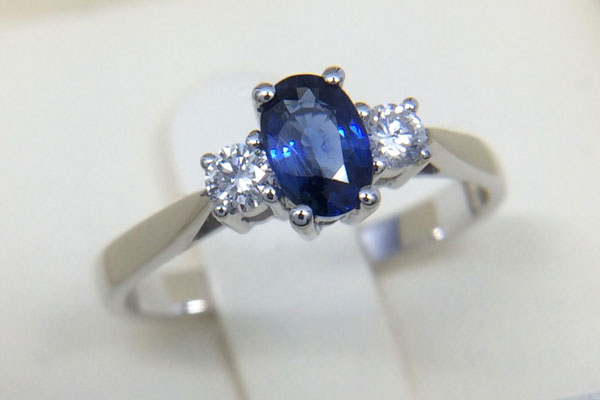
4. Claw Setting
Even though it is one of the most popular setting styles, learning how to set a stone in a claw setting (sometimes called prong setting) is one of the more challenging styles to learn in my opinion.
To start doing claw setting requires:
- 4 Claw settings and round stones
- Burrs (to cut the seats)
- Pushers or pliers
- Files and/or burrs to finish the claws

The reason why I think this is one of the more difficult styles of setting to learn is that getting practice pieces can be expensive but being able to accurately cut seats into multiple prongs takes some practice along with being able to finish the setting to a standard suitable for jewellery, so that the claws don’t snag on clothing or catching hairs.
Next Steps – once you have learnt how to set a round stone in a 4 claw settings, you can then advance on to setting stone into pieces with multiple claws and also fancy shapes along with setting stones with points into claws.
Most of the settings that are commonly used in jewellery are a version of one of these 4 setting styles and once you have learnt the basics, you can then begin to start practicing more advanced techniques so that you can progress your skills further.
How to Start Learning Stone Setting
So we’ve been through the tools and looked at some of the setting styles but how can you actually start learning how to set stones?
The best way is to get an apprenticeship but these aren’t the easiest to come by, especially if you live in an area without any jewellery manufacturers but there are some other ways to learn and thanks to the internet, many are available to people all over the world, so let’s look at some of the ways you can start learning about stone setting:
1: Books
One of the more ‘traditional’ ways of learning is to buy and read stone setting books.
This can be a great way to learn for some people and I’ve got some really good setting books but if you are a visual learner, books often aren’t the best as pictures and descriptions, even detailed step-by-step might not give you enough to be able to picture how to do it.
2. YouTube
YouTube is awesome and a great way to start learning some stone setting basics as there are some channels that have tutorials on certain types of settings and others show you their work process, which can show you some things to try. I’ve listed a few channels that are worth checking out:
These are educational channels that have free videos showing how to do some of the basic setting styles and also cover things like tool preparation amongst other things.
3. Online Courses
Free videos will get you so far but if you want to take your stone setting to the next level, you may want to consider doing an online course as they go into much more detail about different types of stone settings and also include additional resources to help you out, with some popular options being:
- Lucy Walker Jewellery
- Jewellery Training Solutions
- At The Bench by Andrew Berry
There are also many stone setters who are developing online courses, such as:
- Stephen Webb’s Stand Out Stone Setting Academy
- Ian Bernard who offers courses through his website
The benefit of taking online courses is that you can take them no matter where you are in the world and for most, you can learn at your own pace, which can be very helpful for some types of settings.
4. In-Person Training
The final option is in-person training, which is how I got started and there are plenty of places around the world that do stone setting training from the basic to advanced styles.
I personally love doing in-person training as it is much easier to ask the tutor questions and get immediate answer (sometimes they’ll even give you a quick demonstration) and you often get hands on quite quickly but I would recommend going to somewhere that has smaller class sizes as you can get more personalised tuition.
And while I love learning this way, there are some drawbacks:
- It can be expensive, not only the cost of the course but also travel and accommodation if it isn’t local to you
- Limited learning time, many in-person courses are a few days to a couple of weeks, with only a couple doing courses longer than a month (but they are expensive!)
So there are multiple options when it comes to learning about stone setting and it will be down to you, your circumstances and how much money you have to spend as to what is going to be the best option.
Conclusion
I hope this post has been helpful as I tried to cover as much as I could but there is only so much you can put in a blog post but hopefully it has given you some things to think about and look at as you begin your stone setting journey.
When it comes to getting started, I think that learning the basics is very important as is getting the right tools but time spent practicing is by far the most important thing as you will make mistakes but this is good as you learn from this by finding out what doesn’t work and all the great setters I know always look at their work to see what they could do better next time.
As with all skills, learning is a journey not a destination, so make sure you enjoy it, even though there will be times when things don’t go to plan but with time, practice and a willingness to learn, you will start to develop this awesome skill.

I'm Paul Haywood FGA DGA, the owner and founder of Haywoods Gems, I'm a fully qualified Gemmologist and Diamond Grader from the Gemmological Association of Great Britain.